How to create your first transport plan
Prepare a list of cargo pieces and available vehicles. A project represents one transport task; each calculation is one possible solution. You can generate several alternatives within a project and retain their history.
In this article
1. Create a project
Open Projects and click Create project. Give the shipment a recognisable name, such as “Warehouse → Yekaterinburg, 20 September”. Check the selected company workspace first: the project will belong to that workspace.
2. Add your inputs
- On the Cargo tab, add items manually or import a file. Check dimensions in millimetres, weight per piece in kilograms and quantity. A row labelled “Crate, 12 pieces” represents twelve individual cargo pieces.
- Specify the constraints you actually need: permitted rotations, stacking rules, special handling requirements and unloading groups.
- On Vehicles and cost, add the vehicles available for the shipment. Internal body dimensions, payload capacity, price and available quantity are important.
- After editing the tables, click Save changes. Resolve any validation errors before starting.
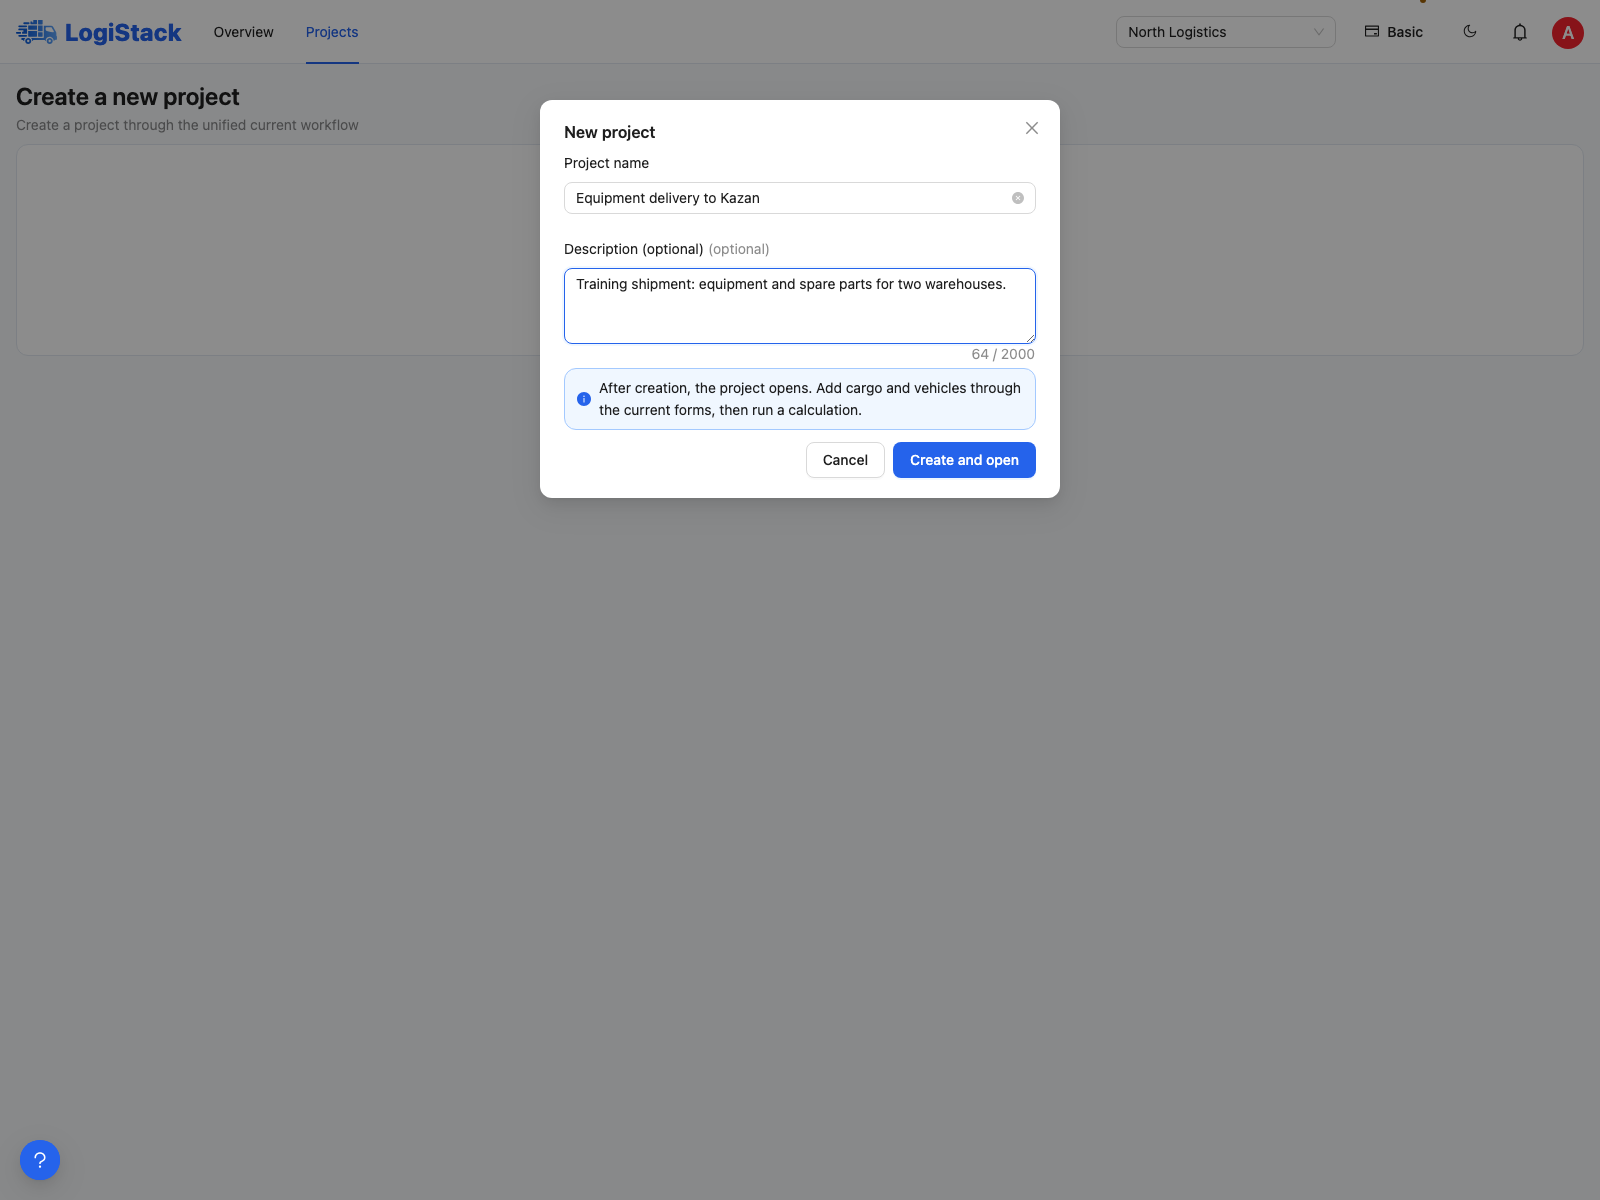
Creating a project: give the shipment a clear name. Educational example.
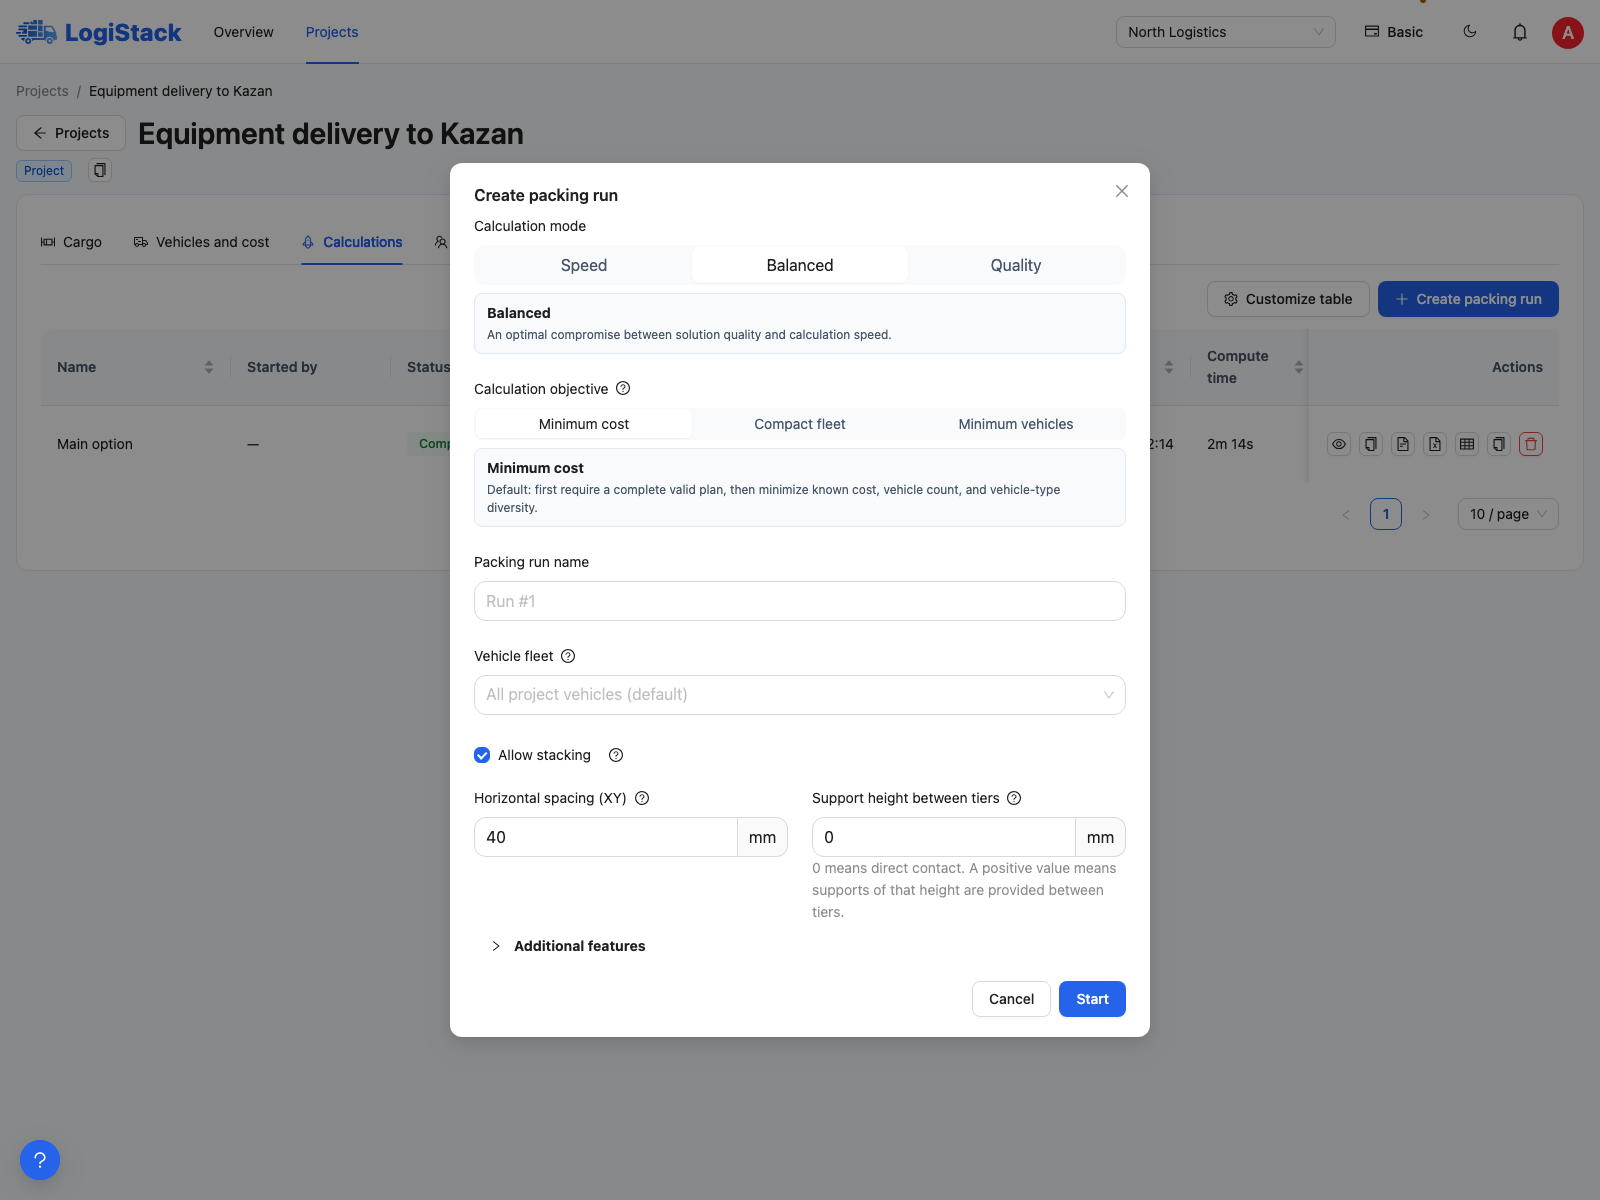
The calculation form: objective, search mode, fleet, stacking and clearances.
If cargo and vehicles are already defined, the project normally opens on Calculations. If inputs are missing, it opens the relevant input tab first.
3. Calculate an alternative
On Calculations, click Create packing run. Use the Packing run name field to describe the alternative, such as “Main option” or “No small vehicles”. Start with Balanced mode and the Minimum cost objective.
Leave Vehicle fleet empty to allow all project vehicles. Selecting vehicle types limits the fleet for this calculation only. Check Allow stacking, clearances and support height. Expand Additional features if needed. Click Start once and wait for the calculation to appear in the list.
4. Review the result
Open the result. First check placed and unplaced quantities, then the vehicles, cost and loading arrangement. Finishing the search does not mean all cargo was placed. Mark a suitable result with Select this plan.
Frequently asked questions
Do I need a new project for every attempt? No. Run further calculations in the same project for the same shipment. If the shipment changes and needs a separate history, copying the project is usually more convenient.
Why can I not start? Check that cargo and vehicles are present, selected vehicles have positive prices, changes are saved, you have editing rights and the subscription has calculation capacity remaining. The form message identifies the problem.
Guided tour and help
When you first enter a workspace, you may see Create your first project. Click Get started to follow 15 steps: check the workspace, create a project, add cargo and vehicles, calculate a plan and review the 3D result.
Do this later or Skip tour closes the guidance without deleting your inputs. To restart, click the round Help button in the lower-left corner and choose Getting started. The same menu opens the knowledge base and support. Tour progress is saved for your user in this browser; the welcome window may not appear automatically for an invited employee.
After signing in, you arrive at Overview. Create a project there or from Projects. Follow the highlighted button during the tour: after adding cargo or a vehicle, the next step opens only when the form is saved successfully.
Next: reviewing a plan and repeating a calculation or creating a copy.